Amazon is the world's largest online marketplace, offering a massive opportunity for businesses to reach millions of customers. Whether you are a manufacturer, a retailer, or a home-based entrepreneur, becoming an Amazon Seller can transform your business. In this guide, we will walk you through exactly how to create an Amazon Seller account and start your selling journey.
Why Sell on Amazon?
Before diving into the registration process, let's look at why Amazon is a top choice for sellers:
- Huge Customer Base: Access to crores of active customers across India and the world.
- Trusted Platform: Customers trust Amazon for reliable delivery and service, which translates to higher sales for you.
- Fulfillment by Amazon (FBA): Amazon can handle storage, packing, and delivery for you.
- Secure Payments: Timely and secure payments directly to your bank account.
Prerequisites for Amazon Seller Registration
To ensure a smooth registration process, keep the following documents and details ready:
- GST Number: Mandatory for selling taxable goods (books are GST exempt).
- PAN Card: Personal PAN for individuals, or Business PAN for companies.
- Active Bank Account: For receiving payments from Amazon.
- Email ID & Mobile Number: For account verification and communication.
Pro Tip: Ensure your mobile number and email ID are active, as you will need them for OTP verification during the sign-up process.
Step-by-Step Guide to Create Amazon Seller Account
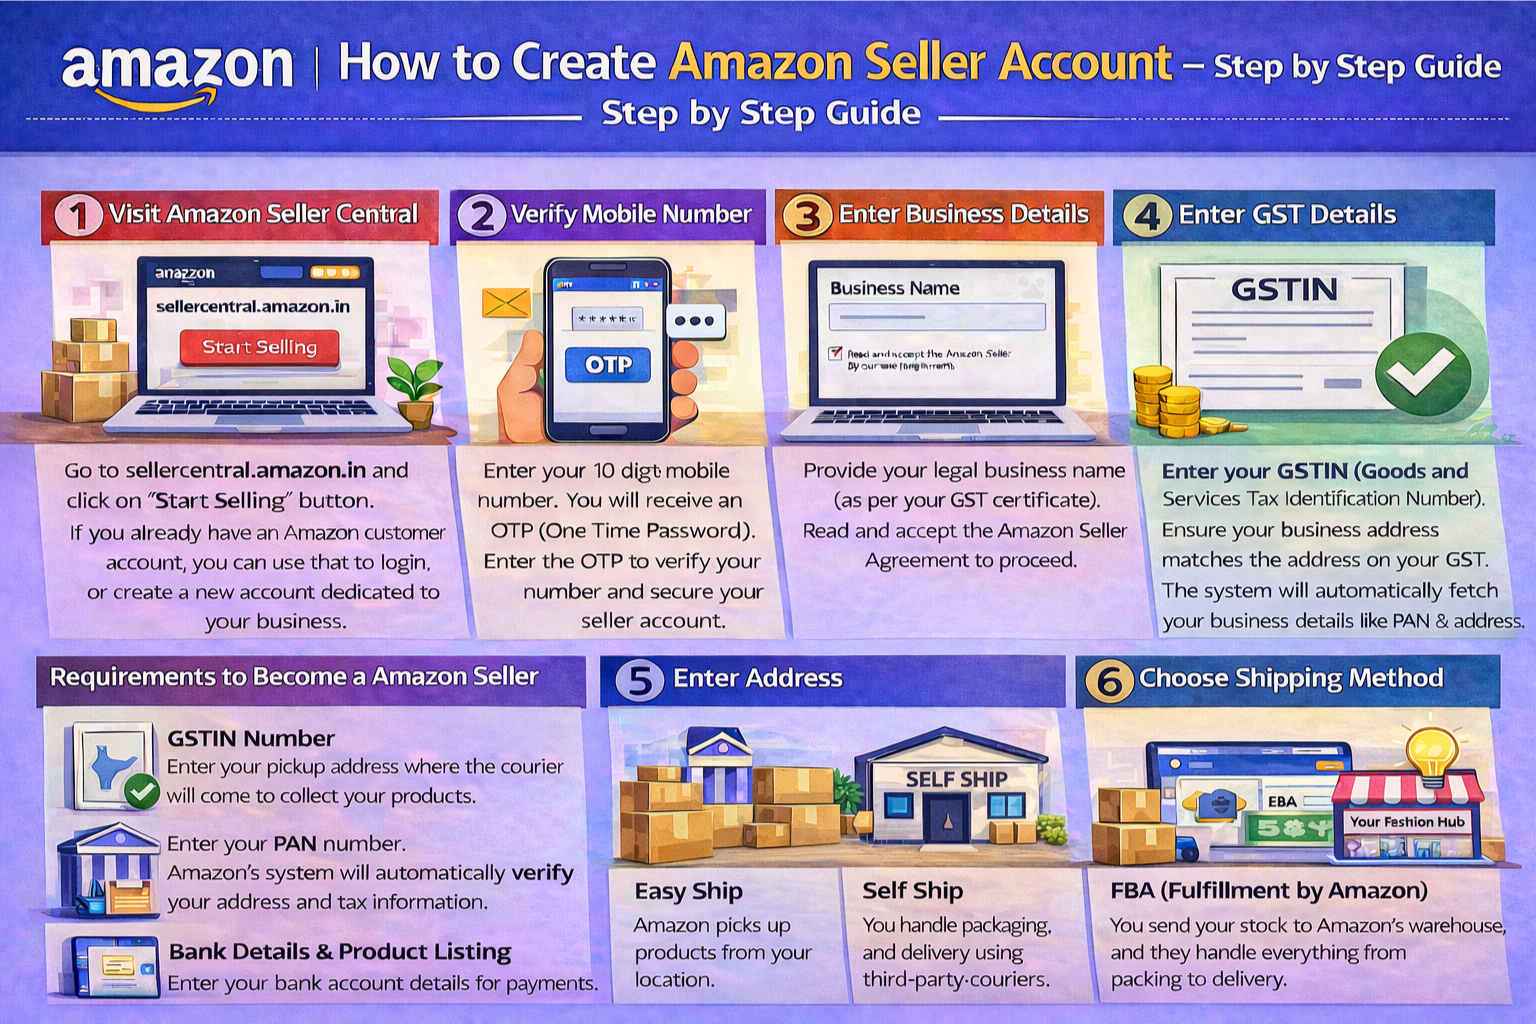
Step 1: Visit Amazon Seller Central
Go to sellercentral.amazon.in and click on the 'Start Selling' button. If you already have an Amazon customer account, you can use that to login, or create a new account dedicated to your business.
Step 2: Verify Mobile Number
Enter your 10-digit mobile number. You will receive an OTP (One Time Password). Enter the OTP to verify your number. This step ensures secure access to your seller account.
Step 3: Enter Business Details
Provide your legal business name (as per your GST certificate). Read and accept the Amazon Seller Agreement to proceed.
Step 4: Add Store Information
Create a unique Store Name for your business on Amazon. This is the name customers will see. Select the primary category for your products (e.g., Clothing, Electronics, Home & Kitchen).
Step 5: Address and Tax Details
Enter your pickup address (where the courier will come to collect your products). Then, enter your GSTIN and PAN number. Amazon's system will verify these details automatically.
Step 6: Choose Shipping Method
Select how you want to ship your products:
- Easy Ship: Amazon picks up products from your location and delivers to the customer.
- Self Ship: You handle packaging and delivery using third-party couriers.
- FBA (Fulfillment by Amazon): You send your stock to Amazon's warehouse, and they handle everything from packing to delivery.
Step 7: Bank Details & Product Listing
Enter your bank account details for payments. Once verified, you can start listing your products. You will need product images, descriptions, and pricing to make your listings live.
Step 8: Winning the Buy Box (Your First Sale)
Getting your account approved is just the beginning. The secret to velocity on Amazon is the Buy Box. When multiple sellers offer the exact same product, Amazon uses an algorithmic score to decide who gets the primary 'Add to Cart' button.
- Price Competitively: Your landed price (item price + shipping) must be within the competitive range.
- Fulfillment Method: Amazon heavily favors FBA (Fulfillment by Amazon) offers because it guarantees Prime 1-day or 2-day delivery.
- Seller Metrics: Maintain an Order Defect Rate (ODR) practically at 0% and respond to all customer queries within 24 hours.
Choosing Your Fulfillment Model
Amazon provides three primary ways to ship items to customers in India:
- FBA (Fulfillment by Amazon): You bulk-ship products to an Amazon warehouse. Amazon picks, packs, and delivers. This grants you the highly coveted 'Prime' badge.
- Amazon Easy Ship: You store and pack the items at your own premises. An Amazon logistics associate comes to your door, picks up the packed box, and delivers it to the customer.
- Self-Ship (Merchant Fulfilled): You are 100% responsible for storing, packing, and hiring a third-party courier (like Delhivery, BlueDart) to deliver the item on time. You must manually upload tracking IDs.
Amazon Label Crop Tool
Doing Self-ship or Easy Ship? Crop dispatch labels for your thermal printer in seconds.
Conclusion
Creating an Amazon Seller account is the first step towards building a successful online business. With the right products, strict adherence to packaging standards, and a customer-focused approach, you can scale your retail business to new heights. Always ensure your logistics flow smoothly by leveraging modern label formatting tools.
Frequently Asked Questions
GST is mandatory for selling taxable goods on Amazon. However, if you sell GST-exempt books, you may register without a GST number.
FBA (Fulfillment by Amazon) means Amazon stores and delivers your products. Easy Ship means you store and pack, but Amazon courier picks it up for delivery.
Amazon charges referral fees, closing fees, and weight-handling fees depending on your product category and fulfillment model.
🚀 Grow Your Seller Account with Our Tools
Process labels 10x faster, calculate absolute profit metrics and improve product listings instantly!


