The Flipkart Seller Dashboard is the control room for your online business. Whether you are a new seller or an experienced supplier, understanding every feature of this panel is crucial for success. In this guide, we will explore the dashboard's key sections and how to use them to grow your sales.
1. Dashboard Overview
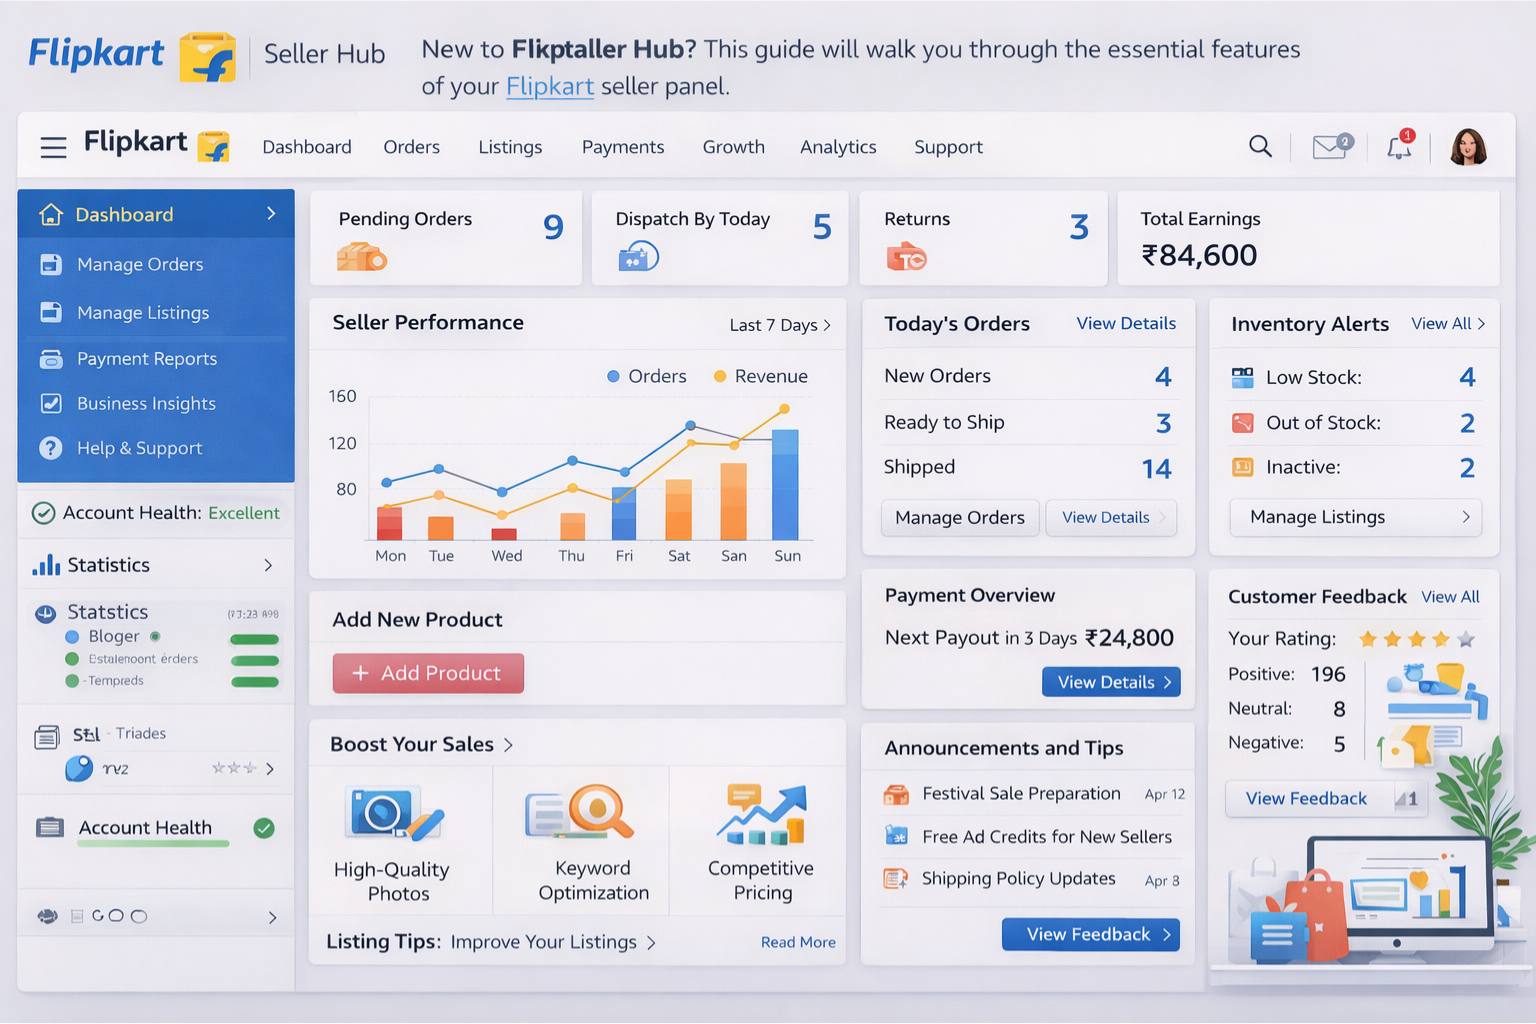
When you log in, the homepage gives you a snapshot of your business health. You'll see:
- Active Orders: Number of orders pending dispatch.
- Sales Metrics: Today's sales vs. yesterday's.
- tier Status: Your current seller tier (Bronze, Silver, or Gold).
2. Order Management Tab
This is where the action happens. You can view pending orders, schedule pickups, and track returns. Efficient order processing is key to maintaining a high seller rating.
Flipkart Label Crop Tool
Smart label formatter. Separate labels and invoices for your thermal printer in one click.
3. Inventory & Listings
The 'My Listings' section allows you to:
- Update stock levels to avoid cancellations.
- Edit product prices and details.
- Track low-inventory SKUs.
Keeping your inventory updated on the dashboard ensures you never miss a sale due to "Out of Stock" errors.
4. Payments & Reports
Transparency is vital. The Payments tab shows:
- Next Settlement Amount: What you will be paid in the next cycle.
- Previous Settlements: History of transfers to your bank.
- Deductions: Commission, shipping, and other fees.
You can download detailed Excel reports to reconcile your accounts.
Free Merge PDF Tool
Combine all your monthly settlement invoices and tax receipts into a single PDF document.
5. Growth Tab (Performance)
Flipkart wants you to grow. The 'Growth' tab suggests:
- Price Recommendations: Competitive pricing to win the Buy Box.
- Product Trends: What customers are searching for in your category.
- Promotions: Opt-in for upcoming sales events like Big Billion Days.
6. Seller Support
Stuck with an issue? The 'Help' section connects you to Flipkart's support team. You can raise tickets for return disputes, payment issues, or account blocks.
7. Understanding the Flipkart Ad Campaign Dashboard
Organic visibility on Flipkart takes time. To kickstart your sales, the Flipkart Ad Campaign board is essential. Found under the Advertising tab, this section allows you to bid on keywords to push your product to the top of search results. Keep a close eye on your Ad ROI (Return on Investment). If a campaign is burning cash without generating orders, pause it immediately and revise your product images or pricing.
8. Deep Dive into the Promotions Tab
Flipkart frequently hosts massive sales events like the Big Billion Days. The promotions dashboard tells you which items are eligible for these mega-sales. Opting into discount pre-approved lists is a proven way to clear slow-moving inventory. When you opt-in, Flipkart often covers a portion of the discount or boosts your search ranking organically as a reward.
9. How Seller Tier Limits Work (Bronze, Silver, Gold)
Flipkart Gamifies the selling experience through its Tier system. All new sellers start at the Bronze tier. Your performance on the dashboard regarding metrics like Return Rate, Cancellation Rate, and Dispatch Breach directly determines if you get promoted. Gold sellers receive incredible benefits, including drastically reduced shipping fees and prioritized customer support resolutions. Check your tier progress weekly on the Dashboard Homepage.
Conclusion
Mastering the Flipkart Seller Dashboard allows you to make data-driven decisions that elevate your store from a Bronze entry-level operation to a Gold-tier powerhouse. By deeply utilizing advertising tabs, monitoring your tier health scores, and processing your manifest documents elegantly with our Label Cropper tool, you will dramatically increase your operational efficiency.
Frequently Asked Questions
Your tier status (Bronze, Silver, or Gold) is displayed on the dashboard homepage along with metrics determining your promotion.
Detailed order and payment reports can be downloaded as Excel sheets from the Payments & Reports tab on the sidebar.
Gold tier sellers enjoy reduced shipping fees, faster payouts, and prioritized support compared to Bronze and Silver tiers.
🚀 Grow Your Seller Account with Our Tools
Process labels 10x faster, calculate absolute profit metrics and improve product listings instantly!


